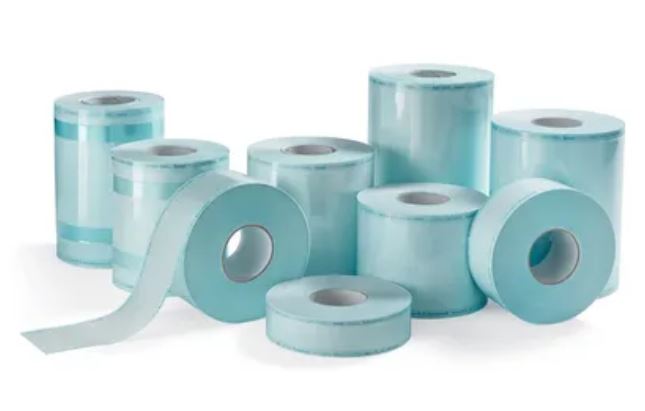
Sterilization Reels: The Ultimate Guide to Safe & Efficient Medical Packaging
In the healthcare and pharmaceutical industries, maintaining sterile conditions is not just a priority—it’s a necessity. One small lapse in sterilization can compromise patient safety, equipment reliability, and institutional credibility. This is where sterilization reels play a crucial role. Sterilization reels are specialized packaging materials designed to maintain the sterility of medical instruments after the sterilization process. Their intelligent design, combined with high-quality medical-grade paper and film, ensures reliable protection against contamination. Whether you’re running a hospital, dental clinic, laboratory, or surgical center, choosing the right sterilization reels can make all the difference in your infection control practices. What Are Sterilization Reels? Sterilization reels are medical packaging materials used to securely enclose instruments before sterilization and maintain their sterility afterward. They are typically composed of: Medical-grade paper: Allows permeability during sterilization. Transparent multilayer film: Provides visibility and acts as a protective barrier. These reels are available in various widths and lengths and can be heat-sealed to create a custom-sized pouch. The transparent film allows easy identification of instruments without opening the pack—saving time and preventing unnecessary contamination. Why Are Sterilization Reels Important? Maintaining sterility until the point of use is one of the biggest challenges in healthcare packaging. Sterilization reels address this challenge through: Barrier Protection: Prevents microorganisms and moisture from entering the packaging. Sterilization Compatibility: Compatible with steam, ethylene oxide (EO), and plasma sterilization methods. User Safety: Reduces the risk of infection by ensuring tools remain sterile until use. Convenience: Customizable lengths and widths make them versatile for various instruments. Cost Efficiency: Reduces packaging waste and improves operational efficiency compared to pre-made pouches. Types of Sterilization Reels There are several types of sterilization reels available, each suited to different sterilization techniques: Steam Sterilization Reels: Designed for autoclave or steam sterilizers, withstand high temperature and humidity, often with steam indicator strips. EO (Ethylene Oxide) Sterilization Reels: Compatible with gas sterilization, include EO indicator ink for safety compliance. Plasma Sterilization Reels: Made for low-temperature plasma sterilization, resistant to oxidation and suitable for delicate instruments. Tyvek® Sterilization Reels: Made from Tyvek® offering microbial barrier properties and tear resistance, ideal for critical applications. Key Features of High-Quality Sterilization Reels Medical-Grade Raw Materials: Paper and film layers comply with ISO 11607 and EN 868 standards. Consistent Seal Integrity: Strong, uniform seals prevent air leakage and maintain sterility. Easy Peel Design: Allows clean opening without paper fiber or film tear. Chemical Indicator Inks: Printed indicators signal exposure to sterilization conditions. Lot Number & Traceability: Ensures batch-level quality tracking and compliance. Transparency & Print Clarity: Helps in visual inspection and labeling for easy identification. How to Use Sterilization Reels Properly Cut the required length of sterilization reel as per instrument size. Seal one end using a heat sealer with consistent temperature and pressure. Insert instruments, ensuring they are dry and clean. Seal the open end, maintaining a proper sealing margin. Label and date the package using a sterilization-proof marker. Sterilize using the correct method (steam, EO, or plasma). Inspect the color change in indicator ink to confirm sterilization. Advantages of Using Sterilization Reels Long-Term Sterility Maintenance – Prevents recontamination after sterilization. Customizable Packaging – Suitable for tools of various sizes. Improved Workflow – Faster packaging and easier identification. Reduced Material Wastage – Use only what’s needed per instrument. Compliance with International Standards – Aligns with ISO, EN, and FDA norms. Common Mistakes to Avoid When Using Sterilization Reels Overfilling pouches, which reduces air circulation and sterilization efficiency. Improper sealing, leading to air leaks. Using damaged reels or film. Ignoring color indicator results. Storing reels in humid or contaminated areas. How to Choose the Right Sterilization Reels Sterilization Method: Steam, EO, or plasma compatibility. Instrument Size and Type: Choose widths accordingly. Regulatory Compliance: Ensure certification (ISO 13485, CE marking, etc.). Supplier Reputation: Source from reliable, certified manufacturers. Customization Options: Printed indicators, logo printing, or custom roll lengths. Frequently Asked Questions (FAQs) 1. What are sterilization reels used for? Sterilization reels are used to pack and maintain the sterility of medical instruments after sterilization processes like steam or EO sterilization. 2. What is the use of a sterilization roll? A sterilization roll is used to securely pack medical instruments before sterilization and maintain sterility afterward, ensuring tools remain clean and safe until use. 3. How long can sterilized items remain sterile in reels? When stored in proper conditions, sterilized items can remain sterile for several months, depending on environmental factors. 4. What is the difference between sterilization reels and pouches? Pouches are pre-made sizes, while reels allow you to customize the length, offering flexibility and reduced waste. 5. Can sterilization reels be used for plasma sterilization? Yes, specific plasma-compatible reels are available that withstand low-temperature sterilization methods. Conclusion Sterilization reels are the backbone of infection prevention and sterile packaging in medical and dental facilities. By choosing high-quality reels that comply with international standards, you safeguard not only your instruments but also patient health and institutional trust. Whether you’re a small clinic or a large hospital, investing in the right sterilization reels ensures peace of mind, safety, and operational efficiency.
Sterilization Reels: The Ultimate Guide to Safe & Efficient Medical Packaging Read More »